Vite 接入指南
本篇介绍了 Vite 项目的接入。
1. 修改 Vite 配置文件
修改 vite.config.js
- 将
base属性设置为相对路径./,确保资源路径正确加载: - 设置允许跨域
js
import { defineConfig } from "vite";

export default defineConfig({
  base: "./", // 设置为相对路径
  server: {
    port: 8990,
    host: true,
    headers: {
      "Access-Control-Allow-Origin": "*" // 设置允许跨域
    }
  }
});
2. 打包上传时需特别设置
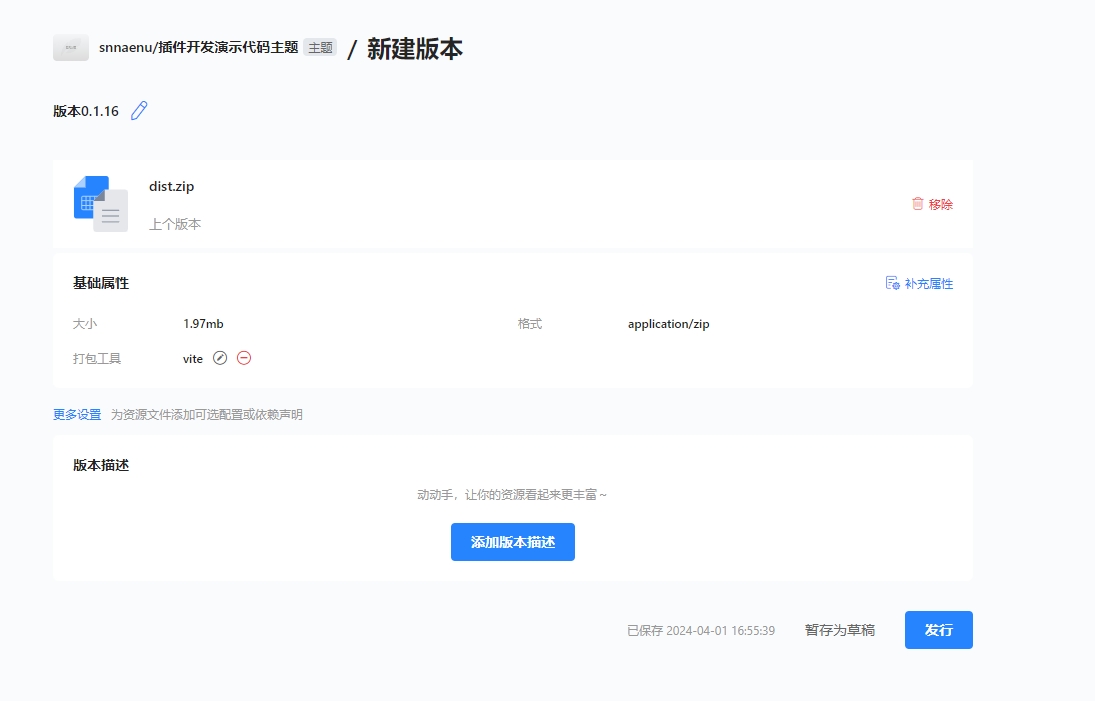
点击"补充属性",在表单中,输入key为 bundleTool , vlaue为vite
配置完成后的示意图如下:

场景一:主题开发者,在开发主题项目中,若加载一个未配置bundleTool: vite的插件时, 可在freelogApp.mountArticleWidget的参数中设置iframe: true:
js
await freelogApp.mountArticleWidget({
  ...,
  renderWidgetOptions: {
    iframe: true, // 手动开启 iframe 沙箱
  },
});
常见问题
1. 子应用中操作 location 异常
问题原因: Vite 构建的脚本默认使用 type="module",导致无法正常拦截 window.location 操作。
解决方案: 使用 MicroApp 提供的 location 对象进行操作,替代原生 window.location。
示例代码:
js
// 访问属性
window.microApp.location.host;
window.microApp.location.origin;

// 修改地址
window.microApp.location.href = "https://example.com";
window.microApp.location.pathname = "/new-path";
总结
以上步骤包括 Vite 的基本配置修改、切换 iframe 沙箱模式以及解决常见问题,确保 Vite 构建的子应用能够顺利接入微前端框架并正常运行。根据实际情况选择适合的配置方案,确保资源加载和沙箱模式的稳定性。